Industry Solutions
Yext Tips To-Go: Leveraging Custom Entity Types
Have you seen a change in what consumers are searching for during the COVID-19 pandemic? You may have noticed that consumers are searching for additional
Yext
Apr 27, 2020

Have you seen a change in what consumers are searching for during the COVID-19 pandemic? You may have noticed that consumers are searching for additional information related to your products or services, charity partnerships, cleaning practices, and other new types of information.
Did you know that you can now also store this 'custom' information in the Yext platform? The Knowledge Graph is no longer limited to location, events, and FAQs information – it can also store custom information in a custom entity type.
Custom entity types allow you to store additional aspects of your brand (e.g., jobs, special offers, recipes, or how to's) in the Yext platform, as well as publish them to your Pages. Each of these custom entity types can have its own set of fields so you can determine which facts to manage and store for each type. This allows you to have full control and flexibility over what information is stored in the Knowledge Graph. No longer are you limited to location data – the sky's the limit!
We've seen customers leverage this functionality by including more information about products on their pages, such as seasonal services like flu shots and allergy care in Healthcare, and recipes for grocery and food services clients. In Retail, clients have added information specific to their charity partnerships, sustainability efforts, and more recently, in depth cleaning efforts information related to COVID-19.
Once added to the Knowledge Graph, you can link entities to highlight their association and make the management of this data easier. This can be useful to manage, e.g. which clinic locations currently offer flu shot services and charity drop offs, or which food services chains are hosting cooking events for recipes that they're currently featuring. Note: If you have an existing page template with this information (e.g. a location page with modules for services and events information), you can quickly spin up pages at scale and update the information in one place, instead of having to update the information everywhere that it's referenced. The update will automatically follow an 'update once, update everywhere' approach.
Note: Custom entities require a subscription to be applied to it. For more information on adding services to custom entities, reach out to your Client Success Manager or Yext Support.
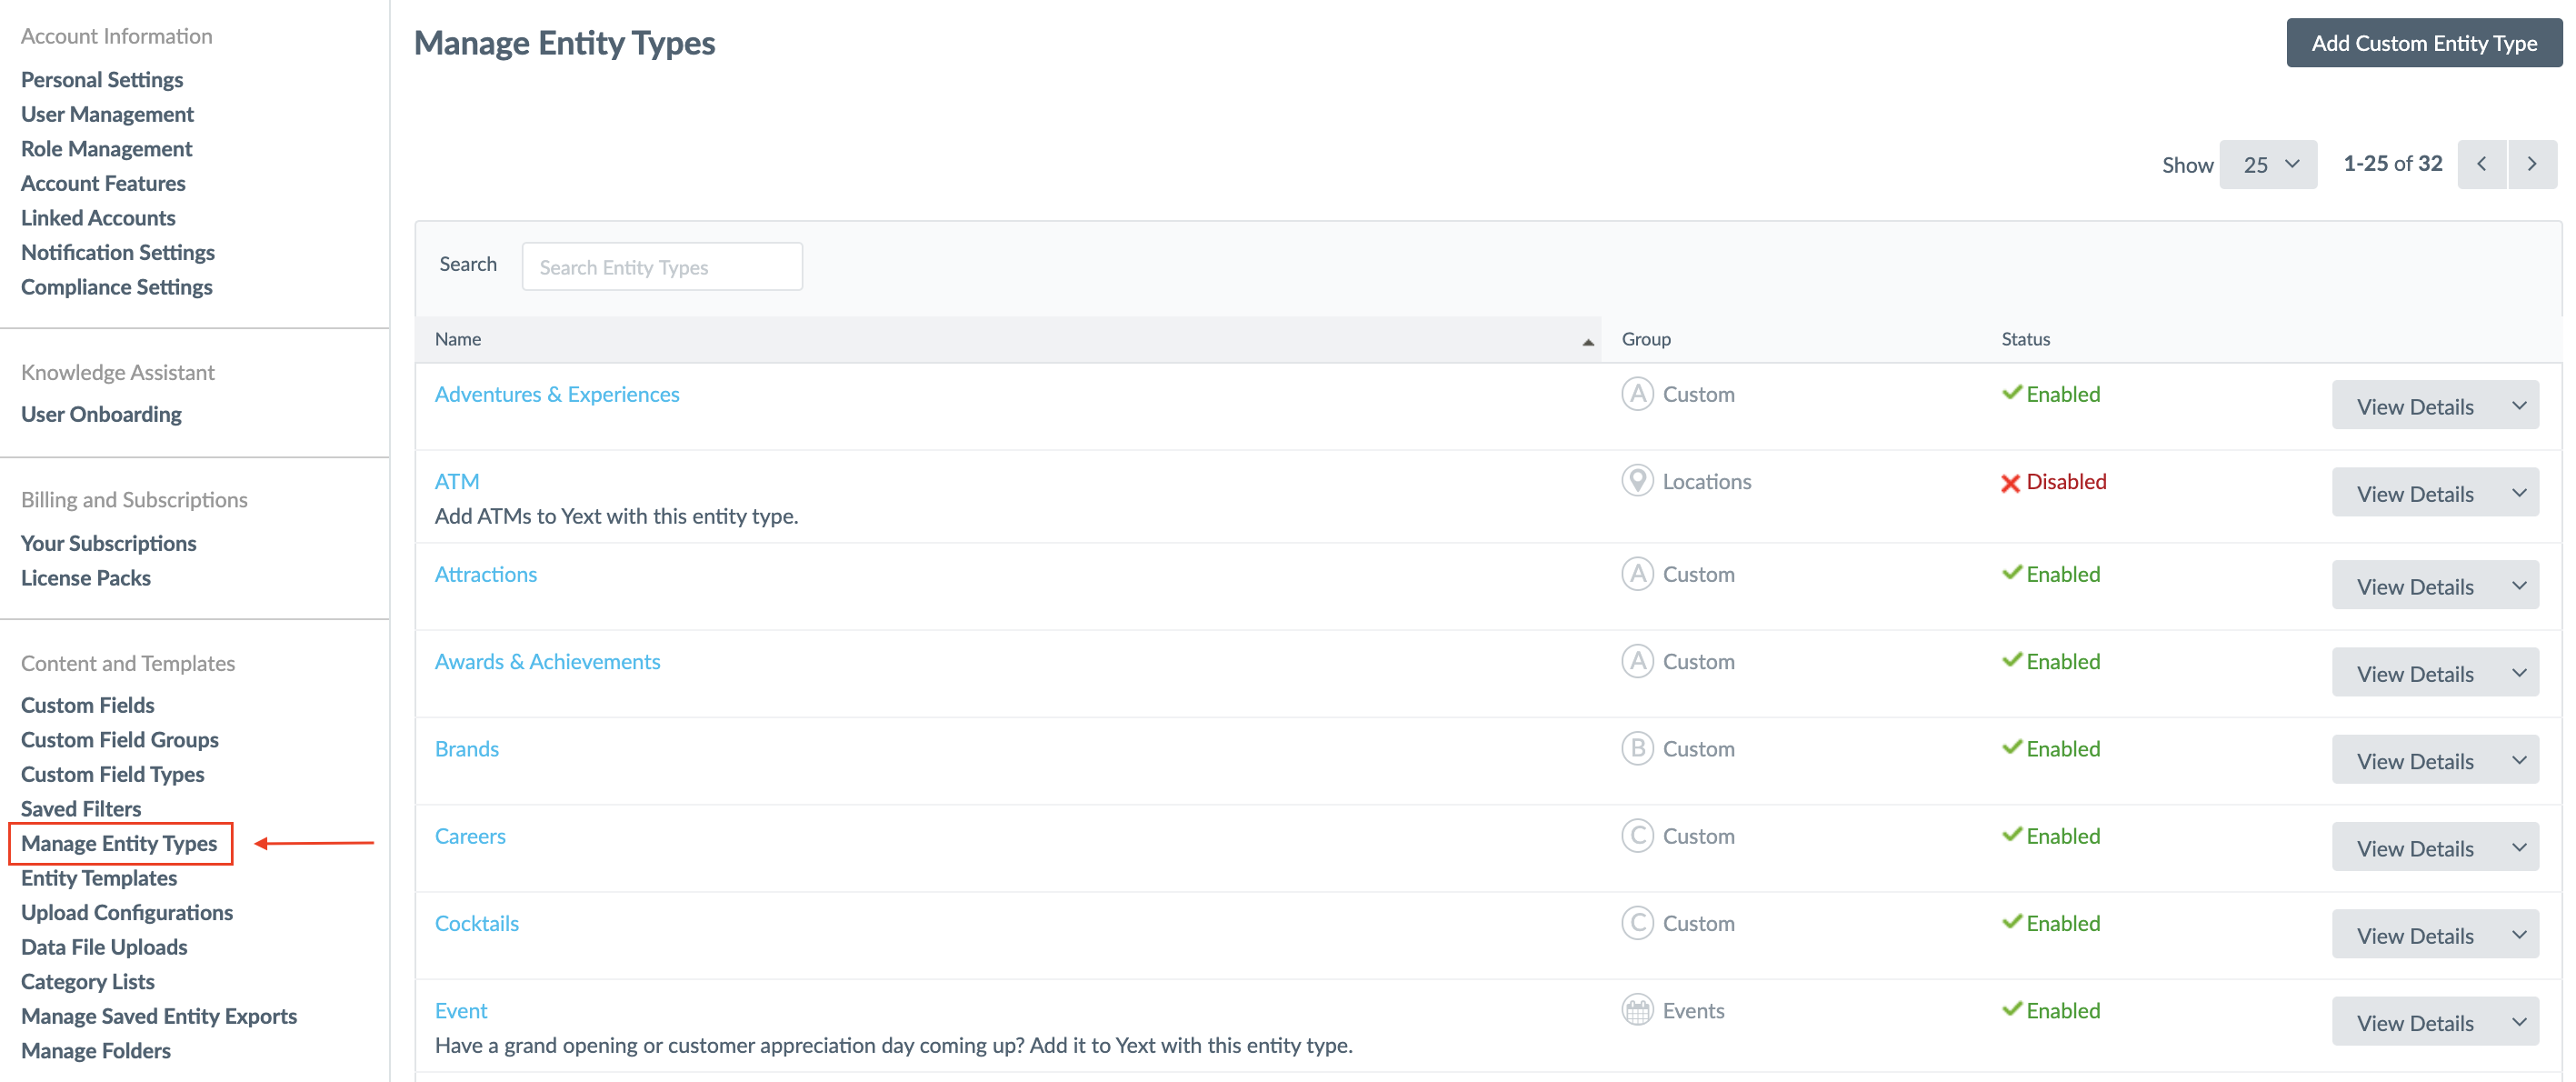
Image: The 'Manage Entity Types' overview under 'Account Settings'
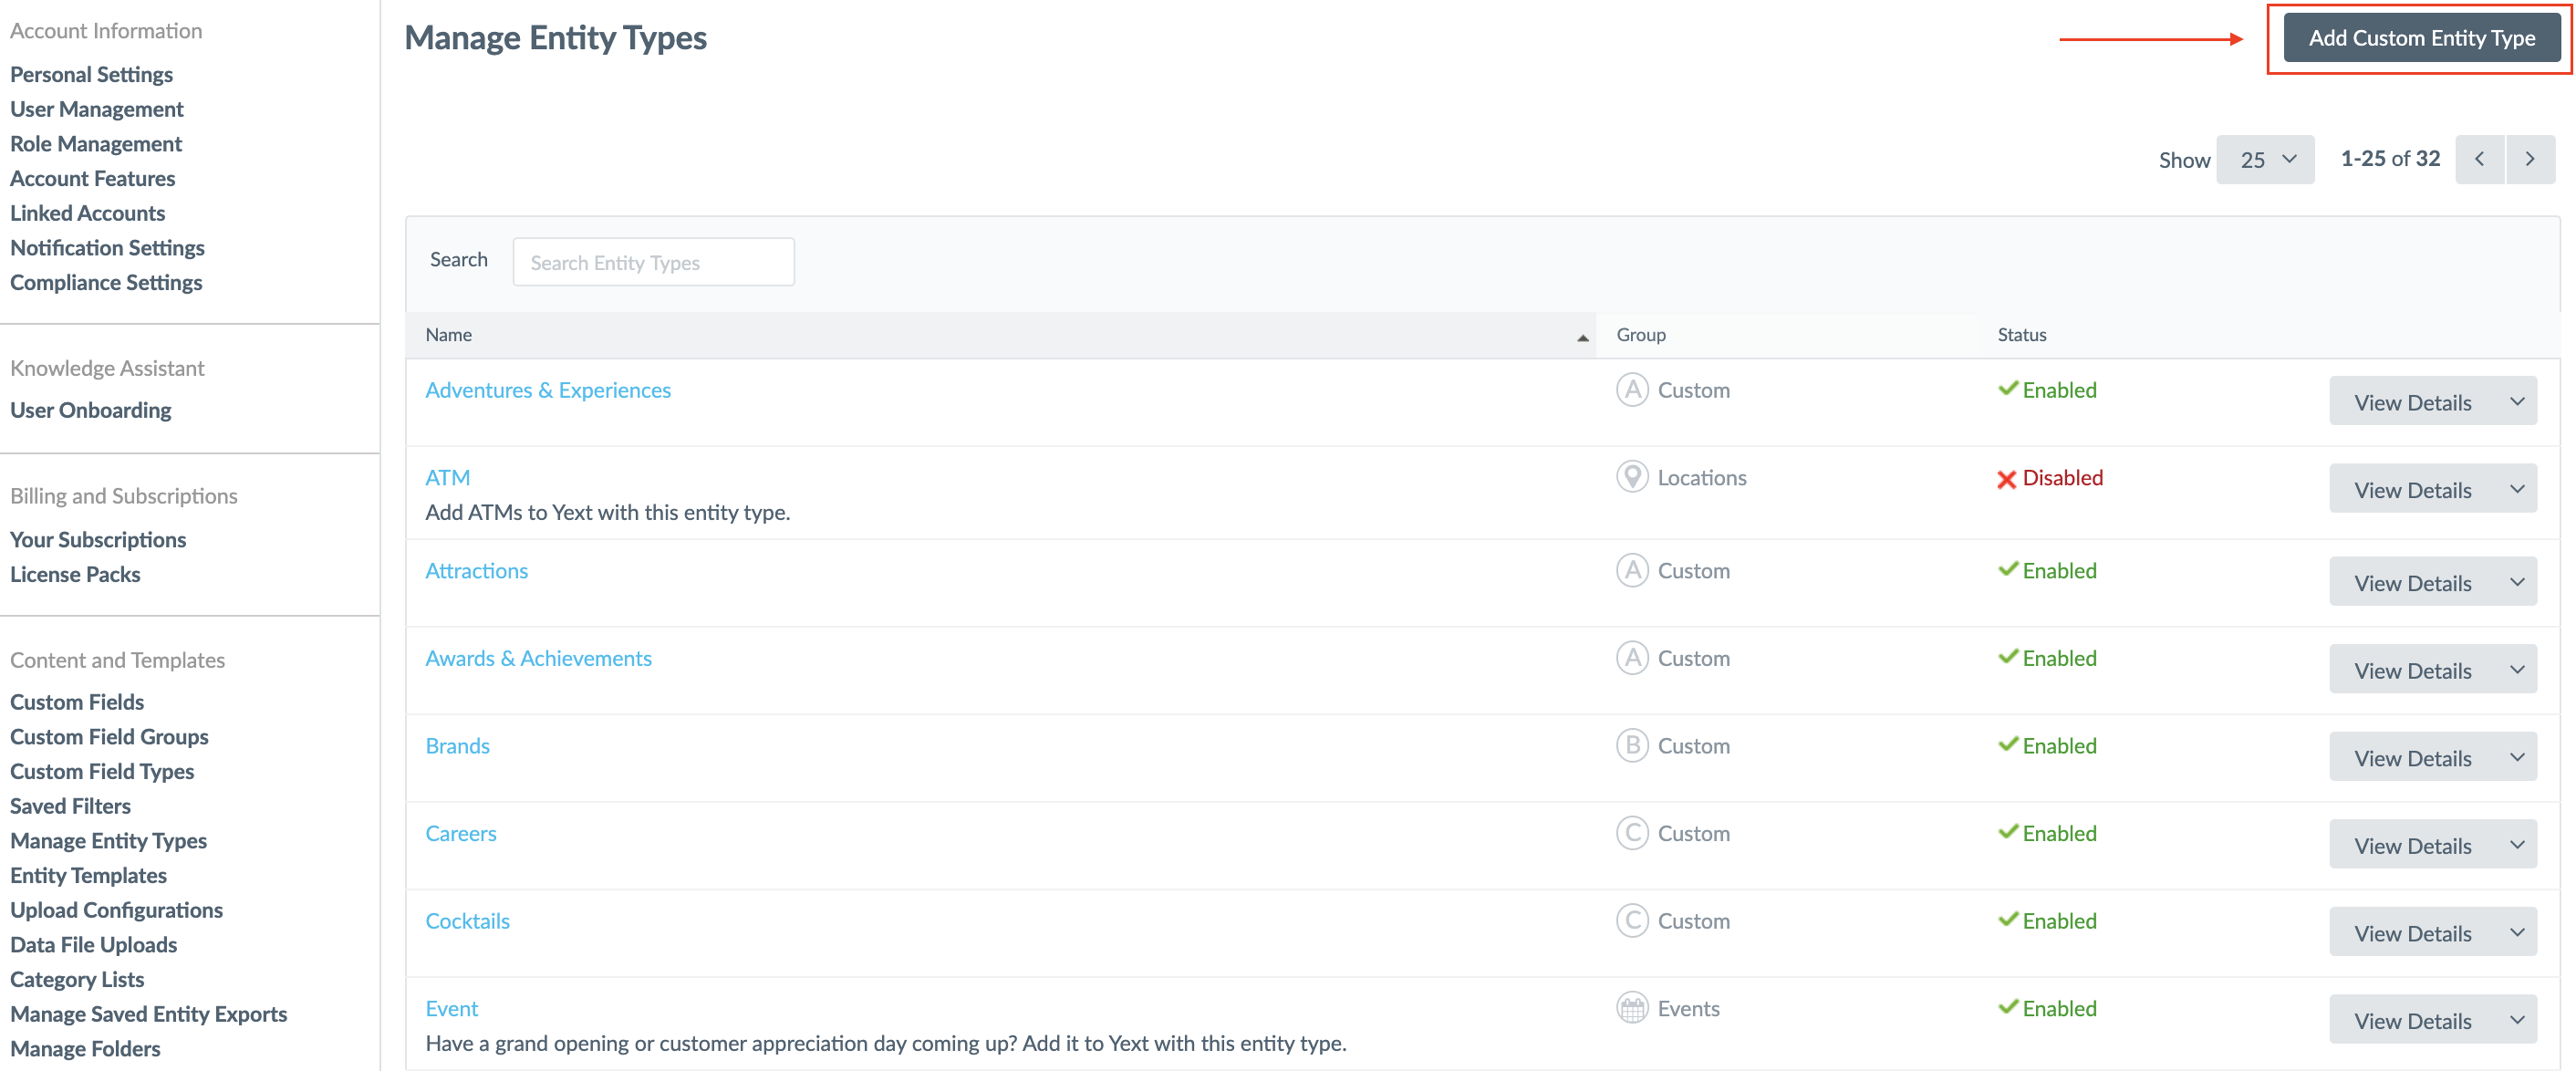
Image: Click 'Add Custom Entity Type' in the top right corner to add a new custom entity type
To create an entity type in Yext, follow these steps:
-
Hover over your name in the top navigation bar and click Account Settings.
-
Click Manage Entity Types in the sidebar.
-
Click Add Custom Entity Type.
-
Enter an Entity Type Name in the textbox.
- To add a translation to the Entity Type Name, or any of the eligible text fields, click on the + Add translation link. A dialog box appears. Select the language of the translation from the drop-down menu, and enter the translation into the text box. Then click Save or Save & Add Another.
-
(Optional) Enter a plural entity type name.
- This will display within the Yext platform when the entity type is referenced in the plural form.
- To add a translation for the Plural Entity Type Name, click on the + Add translation link and follow the steps to add translations for the desired languages.
-
(Optional) Enter a description for the Entity type.
- To add a translation for the description, click on the + Add translation link and follow the steps to add translations for the desired languages.
-
Click Create Custom Entity Type.
-
Select the checkboxes next to the fields you would like to add to the entity.
-
(Optional) Select the checkbox in the Required column to make it a required field.
-
(Optional) Select the checkbox in the Visible on Add column to make the field visible when adding a new entity of this type into the platform.
- If a field is added but not set to visible on add, it will only be visible when editing an existing entity.
-
To create a custom field for this entity type, click on the + Create Custom Field link. For more information, see Add Custom Fields.
-
Once you have added all of the desired fields, click Save.
Note: Remember to enable the new entity type! To enable an entity type, click on the drop-down button next to Edit for the desired entity type, and select 'Enable.'
For more information on Entities, view additional Help Articles here.
We wish you and your teams the best during this critical moment. If you need help updating your business attributes, or anything else, Yext is here to help. Please reach out to your Customer Success Manager as your first point of contact.